
Ford Escape 2020-2026 Service Manual / Powertrain / Engine / Fuel Charging and Controls - Turbocharger - 2.0L EcoBoost (177kW/240PS) – MI4 / Removal and Installation - Wastegate Control Actuator
Ford Escape: Fuel Charging and Controls - Turbocharger - 2.0L EcoBoost (177kW/240PS) – MI4 / Removal and Installation - Wastegate Control Actuator
Removal
NOTICE: The turbocharger compressor vanes can be damaged by even the smallest particles. When removing any turbocharger or engine air intake system component, ensure that no debris enters the system. Failure to do so may result in damage to the turbocharger.
-
Remove the air cleaner outlet pipe.
Refer to: Air Cleaner Outlet Pipe (303-12B Intake Air Distribution and Filtering - 2.0L EcoBoost (177kW/240PS) – MI4, Removal and Installation).
-
Remove the nuts and bolt, then remove the heat shield.
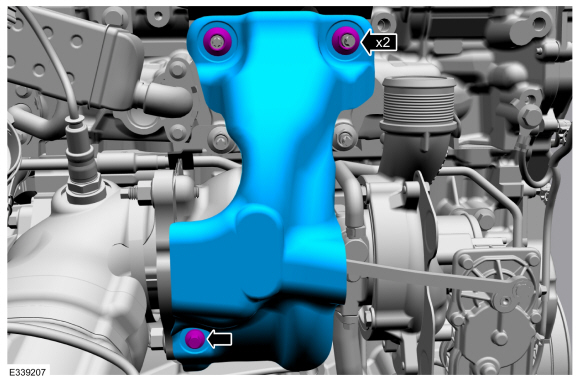 |
-
Disconnect the wastegate control actuator electrical connector.
.jpg) |
-
Remove and discard the wastegate control actuator linkage e-clips, then remove and discard the linkage.
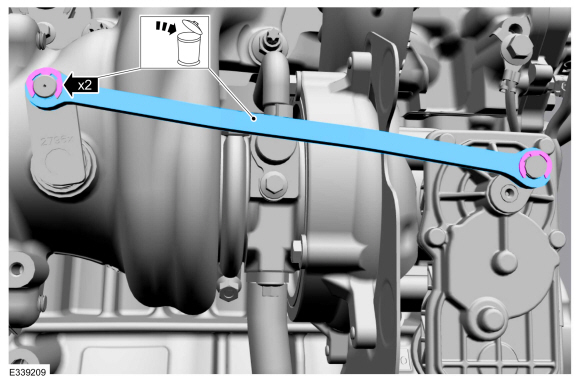 |
-
Remove and discard the wastegate control actuator bolts, then remove the wastegate control actuator.
.jpg) |
Installation
-
Install the wastegate control actuator, then install and tighten the new bolts.
Torque: 62 lb.in (7 Nm)
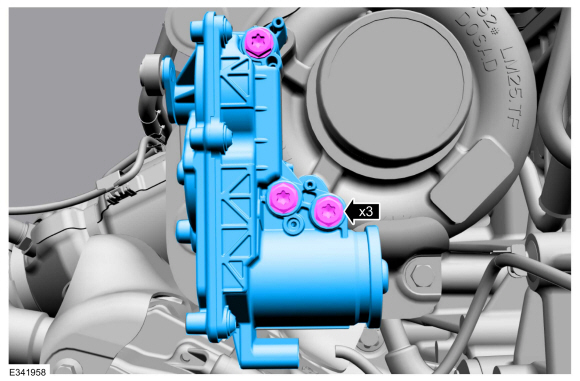 |
-
Install the new wastegate control actuator linkage, then install the new e-clips.
.jpg) |
-
Connect the wastegate control actuator electrical connector.
|
-
-
If the studs came out with the nuts, remove the nuts from the studs.
-
If the studs came out with the nuts, install and tighten the studs.
Torque: 159 lb.in (18 Nm)
-
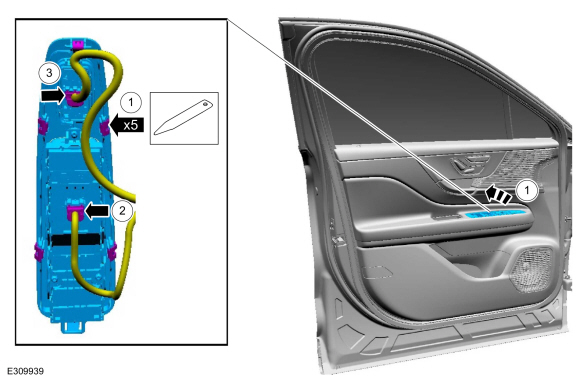
Install the heat shield, then install and tighten the nuts and bolt.
Torque:
Stage 1: Tighten 1 and 2 to : 168 lb.in (19 Nm)
Stage 2: Tighten 1 and 2 to : 39 lb.ft (53 Nm)
Stage 3: Re-tighten 1 and 2 to : 39 lb.ft (53 Nm)
Stage 4: Tighten 3 to : 97 lb.in (11 Nm)
-
If the studs came out with the nuts, remove the nuts from the studs.
 |
-
Install the air cleaner outlet pipe.
Refer to: Air Cleaner Outlet Pipe (303-12B Intake Air Distribution and Filtering - 2.0L EcoBoost (177kW/240PS) – MI4, Removal and Installation).
-
NOTICE: Substantial opening and closing torque is applied by this system. To prevent injury, be careful to keep fingers away from wastegate mechanism when actuated. Failure to follow these instructions may result in personal injury.
With the KOEO , using a diagnostic scan tool, clear the PCM DTC's and reset the KAM .
 Removal and Installation - Turbocharger Oil Supply Tube
Materials
Name
Specification
Motorcraft® Metal Brake Parts CleanerPM-4-A, PM-4-B, APM-4-C
-
Removal
NOTICE:
The turbocharger compressor vanes can be damaged by even the
smallest particles...

Other information:
Ford Escape 2020-2026 Owners Manual: Using SYNC™ With Your Phone
Hands-free calling is one of the main features of SYNC. While the system supports a variety of features, many are dependent on your cellular phone's functionality. At a minimum, most cellular phones with Bluetooth wireless technology support the following functions: Answering an incoming call. Ending a call. Dialing a number. Redialing. Call waiting notification. Caller identification..
Ford Escape 2020-2026 Service Manual: Removal and Installation - Dash Panel
Special Tool(s) / General Equipment 8 mm Drill Bit MIG/MAG Welding Equipment Spot Weld Drill Bit Locking Pliers Materials Name Specification Seam SealerTA-2-B, 3M™ 08308, LORD Fusor® 803DTM - Removal NOTICE: Battery electric vehicle (BEV), hybrid electric vehicle (HEV) and plug-in hybrid electric vehicle (PHEV) contain a high-voltage battery..
Categories
- Manuals Home
- 4th Generation Ford Escape Owners Manual
- 4th Generation Ford Escape Service Manual
- What Is the Tire Pressure Monitoring System. Tire Pressure Monitoring System Overview
- Opening and Closing the Hood
- Adjusting the Headlamps
- New on site
- Most important about car
Vehicle Identification
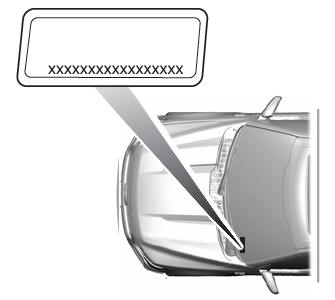
Locating the Vehicle Identification Number
The vehicle identification number is on the left-hand side of the instrument panel.

Copyright © 2026 www.fordescape4.com