Ford Escape: Climate Control System - General Information / General Procedures - Air Conditioning (A/C) Odor Treatment
Inspection
NOTE: There are typically 4 types of objectionable odors found in a vehicle:
- chemical odors
- environmental odors
- human and other interior-generated odors
- microbiological odors
NOTE: Chemical odors are usually constant regardless of the climate control system setting although they may be enhanced by A/C operation. Most chemical odors are caused by fluid leaks or incorrectly cured adhesives. Chemical odors can be eliminated by repairing the leaking component and removing any residue.
NOTE: Environmental odors usually occur for a short time and diminish after the vehicle passes through the affected area. These odors are typically only detected when the vehicle windows are open, or when the climate control system is operating in a mode that allows for fresh air. Environmental odors cannot be eliminated because they are external in source, but they may be minimized by switching to a climate control setting that uses recirculated air.
NOTE: Human and other interior-generated odors occur while the source is present and may linger for a short time after. These odors may be more noticeable during A/C operation. Human odors may be eliminated by removing the source and cleaning the affected area.
NOTE: Microbiological odors, if in the A/C system, usually last for about 30 seconds after the system is turned on. They are detected while the A/C is turned on and using either outside or recirculated air. Microbiological odors that occur in areas other than the A/C system (for example, water in doors or wet carpeting) may last indefinitely and are more intense when recirculated air is used. Microbiological odors are not present at temperatures at or below 10° C (50° F).
Microbiological odors can be eliminated by removing the source and treating the affected area. Allow standing water to drain and dry out. A/C systems may be treated by using Motorcraft® A/C Cooling Coil Coating (YN-29) as described in the service procedure below.NOTE: Microbiological odors result from microbial growth supported by warm temperatures and moisture. Microbiological odors are described as musty/mildew type smells and may occur on/in:
- foam seals
- rubber seals
- adhesives
- standing water
- water soaked carpet/trim
-
Identify the type of odor present in the vehicle. Do not proceed with
A/C odor treatment if the odor source is found to be outside of the A/C
system. Refer to the following list for examples.
Odor Source Odor Description Chemical Odors Coolant Sweet smell Fuel Gasoline or diesel fuel smell Oil Oil type or burning smell Power Steering Fluid Oil type or burning smell Transmission Fluid Oil type or burning smell Washer Fluid Alcohol type smell Gear Lube Garlic/sulfur smell Refrigerant Oil Ether type smell Carpet/trim Adhesives Fishy, urine or sweet smell Evaporator Core Coating Wet cement type smell Environmental Odors Exhaust Exhaust, fuel or burning type smell Industrial Pollutants Various smells Dust Musty, mildew or wet cement type smell Pollen Sweet smell Tobacco Burning, tar smell Human and Other Interior Generated Odors Body Secretions Body odor Perfuming Agents Sweet or fragrance smell Clothing Musty, mildew or body odors Food/Beverage Sweet, musty, mildew or fishy smell Microbiological Odors Microbiological Odors Occurring Inside of A/C System Musty, mildew smell lasting about 30 seconds after A/C is turned on Microbiological Odors Occurring Outside of A/C System Musty, mildew smell lasting indefinitely and possibly more pronounced when using recirculated air
Repair
-
NOTE: Identify the source of the odor.
-
Check the evaporator core drain tube for restriction.
-
Check the passenger and driver side carpet for moisture. If moisture is
found, A/C odor treatment is not necessary. Diagnose for a water leak
as needed.
-
Check the cabin air filter and cabin air filter
cover for moisture resulting from water bypassing the cowl baffling
system. If moisture is found, A/C odor treatment is not necessary. Diagnose for a water leak as needed.
-
Check the inner cowl drain area and air inlet screen
for material obstruction or standing water. Inspect the area
removing any standing water and cleaning the air inlet screen if
possible, by using a wet/dry vacuum.
-
Check the evaporator core drain tube for restriction.
-
Open all vehicle windows and doors.
-
Make sure the A/C is off.
-
Remove the cabin air filter (if equipped).
Refer to: Cabin Air Filter (412-00 Climate Control System - General Information) .
-
NOTE: To avoid damage, do not spill or spray this product on the blower motor speed control.
Remove the blower motor speed control.
Refer to: Blower Motor Control Module (412-00 Climate Control System - General Information) .
-
NOTE: To avoid damage, do not spill or spray this product or water on the blower motor speed control.
Add water (Distilled or deionized water is preferred. Do not apply tap water) in bottle and apply with the A/C Odor Remover Flexible Applicator Tool. For the correct odor removal tool applicator,
Refer to: Climate Control Tools and Equipment (412-00 Climate Control System - General Information, General Procedures).
-
NOTE: Observe the drained water till the water appearance turns to a clear or clean look.
Insert the noozle into the evaporator housing and direct the spray toward the evaporator core face. Spray the deionized water to entire evaporator for 5 - 10 minutes.
-
Select REGISTER/PANEL mode (A/C off).
-
Adjust the temperature setting to full warm.
-
Adjust the blower motor speed to HI.
-
Run the engine for 25 minutes to dry out the A/C system.
-
Turn the ignition OFF.
-
NOTICE: To avoid damage to the vehicle interior, do not spill or spray this product on any interior surface.
NOTE: To avoid damage, do not spill or spray this product on the blower speed control.
NOTE: Only Motorcraft® A/C Cooling Coil Coating (YN-29) is approved for use on Ford vehicles. No other coating is approved. Use of other coatings may cause damage to the factory coating and more odor issues.
Add one full bottle of Motorcraft® A/C Cooling Coil Coating (YN-29) to the A/C Odor Remover Flexible Applicator tool. For the correct odor removal tool applicator,
Refer to: Climate Control Tools and Equipment (412-00 Climate Control System - General Information, General Procedures).
-
Insert the nozzle into the evaporator housing and direct
the spray toward the evaporator core face. Spray the entire evaporator
core face until empty.
-
Install the blower motor speed control.
Refer to: Blower Motor Control Module (412-00 Climate Control System - General Information) .
-
Repeat Steps 8 through 12 to cure the cooling coil coating.
-
Install a new cabin air filter (if equipped).
Refer to: Cabin Air Filter (412-00 Climate Control System - General Information) .
 General Procedures - Air Conditioning (A/C) Compressor Leak Detection
Leak detection
Recover the refrigerant. Refer to Air Conditioning (A/C)
System Recovery, Evacuation and Charging procedure in Group 412.
Disconnect the refrigerant lines from the A/C compressor...
 General Procedures - Air Conditioning (A/C) System Flushing
Materials
Name
Specification
Motorcraft® A/C System Flushing SolventYN-23
-
Flushing
NOTICE:
Use the Refrigerant Identification Equipment before
recovering any of the vehicle's refrigerant...
Other information:
Ford Escape 2020-2026 Service Manual: Removal and Installation - Satellite Radio / Global Positioning System (GPS) Antenna Cable
Removal Remove the front door scuff plates. Refer to: Front Scuff Plate Trim Panel (501-05 Interior Trim and Ornamentation, Removal and Installation). Remove the front seats. Refer to: Front Seat (501-10A Front Seats, Removal and Installation)...
Ford Escape 2020-2026 Service Manual: Description and Operation - Seatbelt Systems - System Operation and Component Description
System Operation Emergency Locking Retractor (ELR) All retractors have an Emergency Locking Retractor (ELR) mode, which is a vehicle-sensitive feature designed to activate and lock the seatbelt webbing during hard braking, cornering, or an impact of approximately 24 km/h (15 mph)...
Categories
- Manuals Home
- 4th Generation Ford Escape Owners Manual
- 4th Generation Ford Escape Service Manual
- Power Outlet - Vehicles With: 12V Power Outlet
- Accessing the Trip Computer. Resetting the Trip Computer
- General Procedures - Brake Service Mode Activation and Deactivation
- New on site
- Most important about car
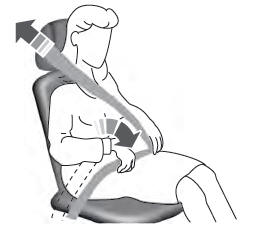
Adjusting the Seatbelts During Pregnancy
WARNING: Always ride and drive with your seatback upright and properly fasten your seatbelt. Fit the lap portion of the seatbelt snugly and low across the hips. Position the shoulder portion of the seatbelt across your chest. Pregnant women must follow this practice. See the following figure.