Ford Escape 2020-2024 Service Manual / Powertrain / Engine / Engine System - General Information / General Procedures - Oil Pressure Test - 2.5L Duratec – Hybrid (121kW/164PS) (BG)
Ford Escape: Engine System - General Information / General Procedures - Oil Pressure Test - 2.5L Duratec – Hybrid (121kW/164PS) (BG)
-
Disconnect the high voltage connector.
For additional information, refer to: High Voltage Connector Disconnect and Connect (414-03A High Voltage Battery, Mounting and Cables, General Procedures).
-
NOTE: It is necessary to disconnect the battery to avoid setting any DTCs that could cause the PCM to command the oil pressure to other than what should be observed from a correctly operating system during the oil pressure test.
Disconnect the battery ground cable.
For additional information, refer to: Battery Disconnect and Connect (414-01 Battery, Mounting and Cables, General Procedures).
-
Remove the EOP sensor. Refer to the appropriate 303-14 Electronic Engine Controls section.
-
NOTE: The VDOP (variable displacement oil pump) solenoid and the EOP sensor must be connected and functional during the oil pressure test.
Assemble the oil pressure adaptors as needed to the oil gallery port. Install the commercially available oil pressure gauge.- 1. M12x1.5 Male to 1/8 NPT Female adaptor
- 2. 1/8 NPT Male to two 1/8 NPT Female T-fitting
- 3. Commercially available oil pressure gauge
- 4. 1/8 NPT Male to M12x1.5 Female adaptor
- 5. Oil pressure sensor
.jpg) |
-
Connect the EOP sensor electrical connector.
-
Connect the battery ground cable.
For additional information, refer to: Battery Disconnect and Connect (414-01 Battery, Mounting and Cables, General Procedures).
-
Connect the high voltage connector.
For additional information, refer to: High Voltage Connector Disconnect and Connect (414-03A High Voltage Battery, Mounting and Cables, General Procedures).
-
Run the engine until normal operating temperature is reached.
-
Run the engine at the specified rpm and record the gauge reading.
-
The oil pressure should be within specifications. Refer to
the 303-01 specifications procedure for each engine for the acceptable
oil pressure range and specific vehicle requirements.
-
If the pressure is not within specification, check the following possible sources:
Visual Inspection Chart
Mechanical - Insufficient oil
- Oil leakage
- Worn or damaged oil pump
- Oil pump screen cover and tube
- Excessive main bearing clearance
- Excessive connecting rod bearing clearance
- Chain tensioner leak
-
Disconnect the battery ground cable.
For additional information, refer to: Battery Disconnect and Connect (414-01 Battery, Mounting and Cables, General Procedures).
-
Disconnect the high voltage connector.
For additional information, refer to: High Voltage Connector Disconnect and Connect (414-03A High Voltage Battery, Mounting and Cables, General Procedures).
-
Disconnect the EOP sensor electrical connector.
-
Remove the commercially available oil pressure gauge. Remove the oil pressure adaptors.
-
Install the EOP sensor. Refer to the appropriate 303-14 Electronic Engine Controls section.
-
Connect the battery ground cable.
For additional information, refer to: Battery Disconnect and Connect (414-01 Battery, Mounting and Cables, General Procedures).
-
Connect the high voltage connector.
For additional information, refer to: High Voltage Connector Disconnect and Connect (414-03A High Voltage Battery, Mounting and Cables, General Procedures).
 General Procedures - Oil Pressure Test
NOTE:
It is necessary to disconnect the battery to avoid
setting any DTCs that could cause the PCM to command the oil pressure to
other than what should be observed from a correctly operating system
during the oil pressure test...
 General Procedures - Piston Diameter
Check
NOTE:
Refer to the appropriate Section 303-01 for the specification.
Measure the piston diameter 90 degrees from the piston
pin and 41 mm (1...
Other information:
Ford Escape 2020-2024 Service Manual: Diagnosis and Testing - Instrument Panel and Interior Switches Illumination
Diagnostic Trouble Code (DTC) Chart Diagnostics in this manual assume a certain skill level and knowledge of Ford-specific diagnostic practices. REFER to: Diagnostic Methods (100-00 General Information, Description and Operation). Diagnostic Trouble Code Chart Module DTC Description Action BCM B1315..
Ford Escape 2020-2024 Service Manual: Removal and Installation - Crankshaft Front Seal
Special Tool(s) / General Equipment 303-096 (T74P-6150-A) Installer, Camshaft Front Oil SealTKIT-2009TC-F 303-409 (T92C-6700-CH) Remover, Crankshaft SealTKIT-1992-FH/FMH/FLMHTKIT-1993-LMH/MH 303-507Timing Peg, Crankshaft TDCTKIT-2001N-FLMTKIT-2001N-ROW Removal Remove the crankshaft pulley. Refer to: Crankshaft Pulley (303-01C Engine, Removal and Installat..
Categories
- Manuals Home
- 4th Generation Ford Escape Owners Manual
- 4th Generation Ford Escape Service Manual
- General Procedures - Transmission Fluid Level Check
- Fuel Quality
- What Is the Tire Pressure Monitoring System. Tire Pressure Monitoring System Overview
- New on site
- Most important about car
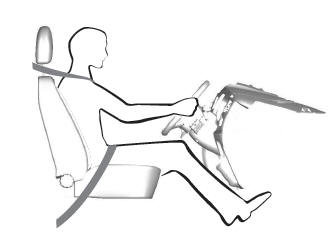
Sitting in the Correct Position

When you use them properly, the seat, head restraint, seatbelt and airbags will provide optimum protection in the event of a crash.
Copyright © 2024 www.fordescape4.com
