Ford Escape: Four-Wheel Drive Systems / Removal and Installation - All-Wheel Drive (AWD) Module - 1.5L EcoBoost (132kW/180PS) – I3 (Y1)/2.0L EcoBoost (177kW/240PS) – MI4
Removal
NOTE: Removal steps in this procedure may contain installation details.
NOTE: If installing a new all-wheel drive module, it is necessary to upload the module configuration information to the scan tool prior to removing the module. This information must be downloaded into the new all-wheel drive module after installation. Using a diagnostic scan tool, begin the PMI process for the all-wheel drive module following the onscreen instructions.
-
Remove the passenger seat.
Refer to: Front Seat (501-10A Front Seats, Removal and Installation).
-
Remove the lower B-pillar trim panel only.
Refer to: B-Pillar Trim Panel (501-05 Interior Trim and Ornamentation, Removal and Installation).
-
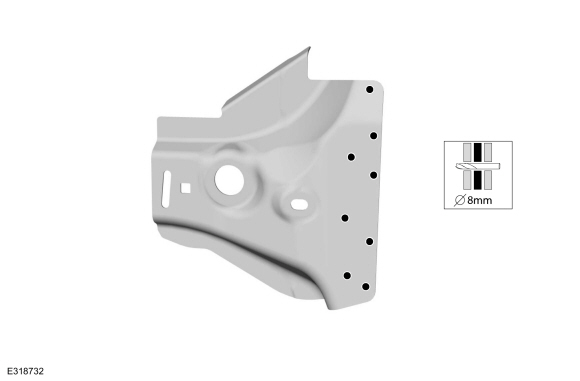
Release the push pins and remove the RH insulation panel.
 |
-
Release the clips and remove the access cover.
.jpg) |
-
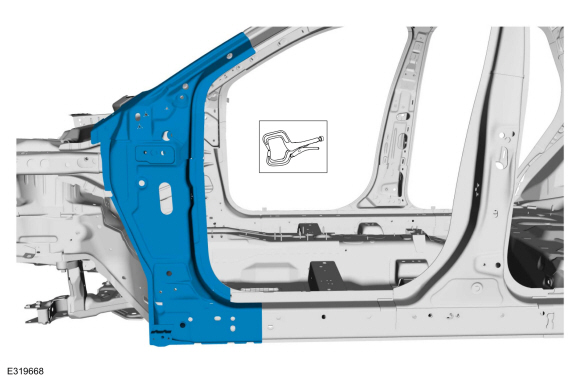
Remove the push pins and position the floor carpet aside.
 |
-
Position the floor carpet aside.
.jpg) |
-
-
Detach the wiring harness retainer from the HVAC duct.
-
Remove the push pins and the HVAC duct.
-
Detach the wiring harness retainer from the HVAC duct.
.jpg) |
-
-
Release the tab from the connector.
-
Disconnect the electrical connector from the module.
-
Release the tab from the connector.
 |
-
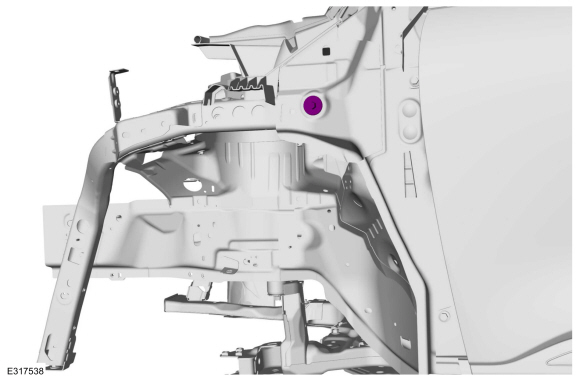
Remove the nuts and the AWD module.
Torque: 89 lb.in (10 Nm)
 |
Installation
-
To install, reverse the removal procedure.
NOTE: Carry out the remaining steps only if installing a new AWD module.
-
NOTE: The 16/17 -digit alpha numeric bar code is located on the label attached to the Rear Drive Unit (RDU).
Using the scan tool, configure RDU bar code to AWD module through the OBD port.
-
Using a diagnostic scan tool, complete the PMI process for the AWD module following the on-screen instructions.
 Diagnosis and Testing - Four-Wheel Drive Systems
Diagnostic Trouble Code (DTC) Chart
Diagnostics in this manual assume a certain skill level and knowledge of Ford-specific diagnostic practices.REFER to: Diagnostic Methods (100-00 General Information, Description and Operation)...
 Removal and Installation - All-Wheel Drive (AWD) Module - 2.5L Duratec – Hybrid (121kW/164PS) (BG)
Special Tool(s) /
General Equipment
Interior Trim Remover
Removal
NOTE:
Removal steps in this procedure may contain installation details...
Other information:
Ford Escape 2020-2025 Owners Manual: Wipers
Wiper Precautions Do not operate the wipers on a dry windshield. This could scratch the glass or damage the wiper blades. Use the windshield washers before wiping a dry windshield. Fully defrost the windshield before you switch the windshield wipers on...
Ford Escape 2020-2025 Service Manual: Description and Operation - Liquefied Petroleum Gas (LPG) and Compressed Natural Gas (CNG) Fuel Systems Health and Safety Precautions
WARNING: Service of Compressed Natural Gas (CNG) or Liquefied Petroleum Gas (LPG) vehicle systems is restricted to qualified personnel and authorized workshops. The required qualifications vary by region. Always observe local laws and legislative directives regarding CNG or LPG vehicle service...
Categories
- Manuals Home
- 4th Generation Ford Escape Owners Manual
- 4th Generation Ford Escape Service Manual
- All-Wheel Drive
- Switching the Rear Window Wiper On and Off. Reverse Wipe
- Accessing the Trip Computer. Resetting the Trip Computer
- New on site
- Most important about car
Master Access Code
What Is the Master Access Code
The master access code is a factory-set five-digit entry code. You can operate the keypad with the master access code at any time. The master access code is on the owner’s wallet card in the glove box and is available from an authorized dealer.
Displaying the Master Access Code
To display the factory-set code in the information display:
