Ford Escape 2020-2026 Service Manual / Body and Paint / Body and Paint / Seatbelt Systems / Removal and Installation - Seatbelt Shoulder Height Adjuster
Ford Escape: Seatbelt Systems / Removal and Installation - Seatbelt Shoulder Height Adjuster
Removal
NOTE: Removal steps in this procedure may contain installation details.
NOTE: Driver side shown, passenger side similar.
-
Remove the upper B-pillar trim panel.
Refer to: B-Pillar Trim Panel (501-05 Interior Trim and Ornamentation, Removal and Installation).
-
Remove the bolt and position the front seatbelt retractor and pretensioner D-ring aside.
Torque: 26 lb.ft (35 Nm)
.jpg) |
-
Remove the seatbelt shoulder height adjuster.
-
Remove the bolt.
Torque: 22 lb.ft (30 Nm)
-
Position the seatbelt shoulder height adjuster up and out.
-
Remove the bolt.
.jpg) |
Installation
NOTE: During installation, make sure the seatbelt webbing is not twisted and the seatbelts and buckles are accessible to the occupants.
-
To install, reverse the removal procedure.
-
Check the seatbelt system for correct operation.
Refer to: Seatbelt System Functional Tests (501-20A Seatbelt Systems, General Procedures).
 Removal and Installation - Rear Seatbelt Retractor and Pretensioner
Removal
WARNING:
The following procedure prescribes critical repair steps
required for correct restraint system operation during a crash. Follow
all notes and steps carefully...

Other information:
Ford Escape 2020-2026 Service Manual: Removal and Installation - Rear Seat Armrest
Special Tool(s) / General Equipment Interior Trim Remover Removal NOTE: Removal steps in this procedure may contain installation details. Remove the rear seat. Refer to: Rear Seat (501-10B Rear Seats, Removal and Installation). Detach the rear seat backrest cover J-clip. Remove the rear seat backrest cover inboard child safe..
Ford Escape 2020-2026 Owners Manual: AM/FM Radio
Tuning a Station You can use the tune or seek controls on the radio bezel to select a station. To tune a station using the touchscreen, select: A pop up appears, allowing you to type in the frequency of a station. You can only enter a valid station for the source you are currently listening to. You can press the backspace button to delete the previously entered number. Once you have entered..
Categories
- Manuals Home
- 4th Generation Ford Escape Owners Manual
- 4th Generation Ford Escape Service Manual
- Switching the Rear Window Wiper On and Off. Reverse Wipe
- Opening and Closing the Hood
- Removal and Installation - All-Wheel Drive (AWD) Module - 1.5L EcoBoost (132kW/180PS) – I3 (Y1)/2.0L EcoBoost (177kW/240PS) – MI4
- New on site
- Most important about car
Sitting in the Correct Position
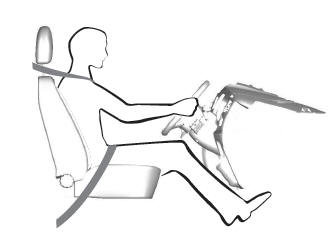
When you use them properly, the seat, head restraint, seatbelt and airbags will provide optimum protection in the event of a crash.
Copyright © 2026 www.fordescape4.com