Ford Escape: Fuel Charging and Controls - Turbocharger - 1.5L EcoBoost (132kW/180PS) – I3 (Y1) / Removal and Installation - Turbocharger Coolant Supply Tube
Materials
| Name | Specification |
|---|---|
| Motorcraft® Metal Brake Parts Cleaner PM-4-A, PM-4-B, APM-4-C |
- |
Removal
NOTICE: The turbocharger compressor vanes can be damaged by even the smallest particles. When removing any turbocharger or engine air intake system component, ensure that no debris enters the system. Failure to do so may result in damage to the turbocharger.
NOTICE: Special attention needs to be given to the sealing ports for the oil feed, the oil drain, and the coolant lines, on turbocharged engines. The sealing ports must be totally clean and free from O-ring residue, have no damage to the sealing surface and the lines to ensure that there are no leaks or repeat repairs.
-
Drain the cooling system.
Refer to: Engine Cooling System Draining, Vacuum Filling and Bleeding (303-03A Engine Cooling - 1.5L EcoBoost (132kW/180PS) – I3 (Y1), General Procedures).
-
Remove the cowl panel grille.
Refer to: Cowl Panel Grille (501-02 Front End Body Panels, Removal and Installation).
-
Remove the air cleaner outlet pipe.
Refer to: Air Cleaner Outlet Pipe (303-12A Intake Air Distribution and Filtering - 1.5L EcoBoost (132kW/180PS) – I3 (Y1), Removal and Installation).
-
Remove the air cleaner intake pipe.
Refer to: Air Cleaner Intake Pipe (303-12A Intake Air Distribution and Filtering - 1.5L EcoBoost (132kW/180PS) – I3 (Y1), Removal and Installation).
-
Remove the air cleaner.
Refer to: Air Cleaner (303-12A Intake Air Distribution and Filtering - 1.5L EcoBoost (132kW/180PS) – I3 (Y1), Removal and Installation).
-
Remove the catalytic converter.
Refer to: Catalytic Converter (309-00A Exhaust System - 1.5L EcoBoost (132kW/180PS) – I3 (Y1), Removal and Installation).
Refer to: Catalytic Converter (309-00A Exhaust System - 1.5L EcoBoost (132kW/180PS) – I3 (Y1), Removal and Installation).
-
Remove the bracket bolt, loosen the turbocharger coolant
tube bolt, then disconnect the turbocharger coolant tube.
 |
-
Remove the bracket bolt.
 |
-
Detach the wire connector retainer from the bracket.
Remove the bolt, disconnect the turbocharger coolant supply tube and
remove the tube.
 |
-
-
Remove and discard the turbocharger coolant tube O-ring seals.
-
Inspect the turbocharger tube and the sealing
surfaces. Ensure that the retaining bracket is not bent, check for
square-ness of the retaining bracket to the O-ring area. Use brake
cleaner and a nylon brush to clean.
Material: Motorcraft® Metal Brake Parts Cleaner / PM-4-A, PM-4-B, APM-4-C
-
Remove and discard the turbocharger coolant tube O-ring seals.
.jpg) |
Installation
-
NOTE: Component(s) must be lubricated with clean engine coolant.
Install the new the turbocharger coolant tube O-ring seals, lubricate with clean engine coolant.
Refer to: Specifications (303-03A Engine Cooling - 1.5L EcoBoost (132kW/180PS) – I3 (Y1), Specifications).
.jpg) |
-
-
Carefully use a nylon brush to remove the old O-ring
residue and use brake cleaner to rinse the O-ring residue out of the
turbocharger O-ring bore and the engine O-ring bore. Inspect the area
for deep scratches and gouges. Install new components if needed.
-
Install the turbocharger supply tube, then install and tighten the bolt. Attach the wire connector retainer.
Material: Motorcraft® Metal Brake Parts Cleaner / PM-4-A, PM-4-B, APM-4-C
Torque: 89 lb.in (10 Nm)
-
Carefully use a nylon brush to remove the old O-ring
residue and use brake cleaner to rinse the O-ring residue out of the
turbocharger O-ring bore and the engine O-ring bore. Inspect the area
for deep scratches and gouges. Install new components if needed.
|
-
Install and tighten the bracket bolt.
Torque: 89 lb.in (10 Nm)
|
-
Connect the turbocharger coolant tube, tighten the
turbocharger coolant tube bolt. Then install and tighten the bracket
bolt.
Torque: 89 lb.in (10 Nm)
|
-
Install the catalytic converter.
Refer to: Catalytic Converter (309-00A Exhaust System - 1.5L EcoBoost (132kW/180PS) – I3 (Y1), Removal and Installation).
Refer to: Catalytic Converter (309-00A Exhaust System - 1.5L EcoBoost (132kW/180PS) – I3 (Y1), Removal and Installation).
-
Install the air cleaner.
Refer to: Air Cleaner (303-12A Intake Air Distribution and Filtering - 1.5L EcoBoost (132kW/180PS) – I3 (Y1), Removal and Installation).
-
Install the air cleaner intake pipe.
Refer to: Air Cleaner Intake Pipe (303-12A Intake Air Distribution and Filtering - 1.5L EcoBoost (132kW/180PS) – I3 (Y1), Removal and Installation).
-
Install the air cleaner outlet pipe.
Refer to: Air Cleaner Outlet Pipe (303-12A Intake Air Distribution and Filtering - 1.5L EcoBoost (132kW/180PS) – I3 (Y1), Removal and Installation).
-
Install the cowl panel grille.
Refer to: Cowl Panel Grille (501-02 Front End Body Panels, Removal and Installation).
-
Fill and bleed the cooling system.
Refer to: Engine Cooling System Draining, Vacuum Filling and Bleeding (303-03A Engine Cooling - 1.5L EcoBoost (132kW/180PS) – I3 (Y1), General Procedures).
 Removal and Installation - Turbocharger Coolant Return Tube
Materials
Name
Specification
Motorcraft® Metal Brake Parts CleanerPM-4-A, PM-4-B, APM-4-C
-
Removal
Drain the cooling system...
 Removal and Installation - Turbocharger Oil Return Tube
Materials
Name
Specification
Motorcraft® Metal Brake Parts CleanerPM-4-A, PM-4-B, APM-4-C
-
Removal
NOTICE:
The turbocharger compressor vanes can be damaged by
even the smallest particles...
Other information:
Ford Escape 2020-2026 Owners Manual: Body Control Module
Argentina Ghana Jamaica Mauritania Morocco Paraguay 2020-07-I-0405 Serbia Singapore South Africa South Korea R-R-175-P005 United Arab Emirates (U.A.E.) United States and Canada WARNING: Changes or modifications not expressively approved by the party responsible for compliance could void the user's authority to operate the equipment...
Ford Escape 2020-2026 Service Manual: Removal and Installation - Battery Cables - 1.5L EcoBoost (132kW/180PS) – I3 (Y1)
Removal NOTE: This procedure provides information about routing, retaining points and connectors of the cable. It does not include the steps for removing components to gain access to the cable. Disconnect the battery. Refer to: Battery Disconnect and Connect (414-01 Battery, Mounting and Cables, General Procedures)...
Categories
- Manuals Home
- 4th Generation Ford Escape Owners Manual
- 4th Generation Ford Escape Service Manual
- Opening and Closing the Hood
- General Procedures - Brake Service Mode Activation and Deactivation
- Adjusting the Headlamps
- New on site
- Most important about car
Under Hood Fuse Box
Locating the Under Hood Fuse Box
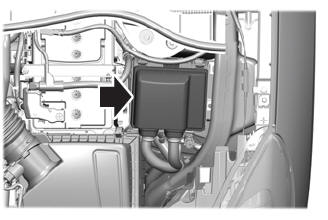
Accessing the Under Hood Fuse Box