Ford Escape 2020-2026 Service Manual / Body and Paint / Body and Paint / Exterior Trim and Ornamentation / Removal and Installation - Front Door Upper Moulding
Ford Escape: Exterior Trim and Ornamentation / Removal and Installation - Front Door Upper Moulding
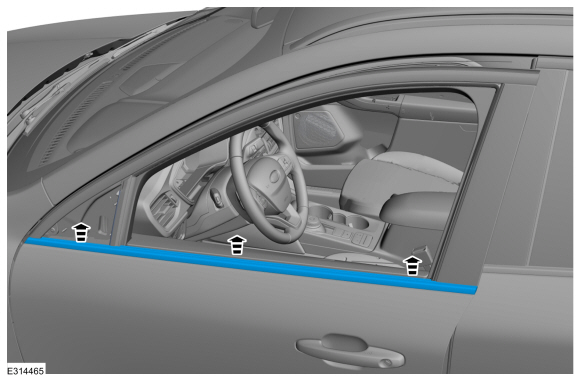
Removal
NOTE: Removal steps in this procedure may contain installation details.
NOTE: LH side shown, RH similar.
All vehicles
-
Remove the exterior mirror.
Refer to: Exterior Mirror (501-09 Rear View Mirrors, Removal and Installation).
-
Remove the upper belt moulding screw at rear of the door.
Torque: 8 lb.in (0.9 Nm)
.jpg) |
-
Remove the upper belt moulding screw at front of the door.
Torque: 8 lb.in (0.9 Nm)
.jpg) |
-
Using a non-marring trim tool, disengage the moulding from the channel in the door and remove the moulding.
 |
-
Position the glass run weatherstrip aside.
.jpg) |
-
Remove the screw on the upper door frame.
Torque: 8 lb.in (0.9 Nm)
.jpg) |
Vehicles With: Keyless Vehicle System
-
Remove the LHF door window regulator and motor.
Refer to: Front Door Window Regulator and Motor (501-11 Glass, Frames and Mechanisms, Removal and Installation).
-
-
Disconnect the electrical connector.
-
Detach the wiring harness clips.
-
Disconnect the electrical connector.
.jpg) |
All vehicles
-
NOTE: Use New retainer clips.
NOTE: Standard front door upper moulding shown, keyless entry similar.
-
Remove and discard the retainer clips and dislodge the 4-way clip.
-
Remove the front door upper moulding.
-
Remove and discard the retainer clips and dislodge the 4-way clip.
.jpg) |
Installation
-
To install, reverse the removal procedure.
 Removal and Installation - Front Door Moulding
Special Tool(s) /
General Equipment
Interior Trim Remover
Removal
NOTE:
Removal steps in this procedure may contain installation details...
 Removal and Installation - Front Fender Moulding
Removal
NOTE:
Removal steps in this procedure may contain installation details.
Remove the push pins.
Remove the push pins...
Other information:
Ford Escape 2020-2026 Service Manual: Description and Operation - Engine Cooling - Component Location
NOTE: Coolant temperature will vary with ambient temperature and load. Temperatures shown are for ambient temperature of 38° C (100° F). Red arrows indicate a temperature over 90° C (194° F), Orange arrows indicate a temperature of approximately 90° C (194° F), Blue arrows indicate a temperature below 90° C (194° F)...
Ford Escape 2020-2026 Service Manual: Description and Operation - Glass, Frames and Mechanisms - Vehicles With: One-Touch Open Driver Window - Overview
Overview Power Window Operation The power windows operate only when the ignition is on, or up to 10 minutes after the ignition is changed from on to off while the front driver and passenger doors remain closed. Standard power window features include one-touch down operation (driver door window only) when the driver window control switch is momentarily pressed to the second detent and r..
Categories
- Manuals Home
- 4th Generation Ford Escape Owners Manual
- 4th Generation Ford Escape Service Manual
- Description and Operation - Identification Codes
- General Procedures - Brake Service Mode Activation and Deactivation
- Opening and Closing the Hood
- New on site
- Most important about car
Symbols Glossary
These are some of the symbols you may see on your vehicle.
 Air conditioning system
Copyright © 2026 www.fordescape4.com