Ford Escape: Front Seats / Removal and Installation - Front Seat Backrest
Removal
 WARNING:
The following procedure describes critical repair steps
required for correct seat component installation. Follow all notes and
steps carefully. Do not place any objects between the seat components
and the body of the vehicle, nor any objects within a joint internal to
the seat structure. Failure to follow step instructions may result in
incorrect operation of the seat components and increases the risk of
serious personal injury.
WARNING:
The following procedure describes critical repair steps
required for correct seat component installation. Follow all notes and
steps carefully. Do not place any objects between the seat components
and the body of the vehicle, nor any objects within a joint internal to
the seat structure. Failure to follow step instructions may result in
incorrect operation of the seat components and increases the risk of
serious personal injury.
NOTE: Removal steps in this procedure may contain installation details.
-
Remove the front seat.
Refer to: Front Seat (501-10A Front Seats, Removal and Installation).
-
Remove the front seat side shield screws.
 |
Passenger seat with manual recline.
-
Remove the front seat recline handle cover.
-
Lift the recline handle.
-
Release the tab.
-
Remove the recline handle cover.
-
Lift the recline handle.
.jpg) |
-
If equipped with a manual seat track.
-
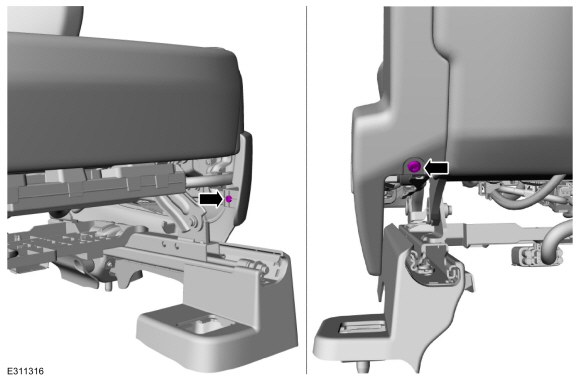
Firmly grasp the front seat side shield, lift up
and out, separating the side shield from the recliner bracket.
-
From underneath the seat, squeeze the retainers together and pull out on the front seat side shield.
-
Slide the front seat side shield forward and remove the front seat side shield.
-
Firmly grasp the front seat side shield, lift up
and out, separating the side shield from the recliner bracket.
.jpg) |
Seats with power seat track
-
-
Firmly grasp the front seat side shield, lift up
and out, separating the side shield from the recliner bracket.
-
Slide the front seat side shield forward and separate the side shield from the seat.
-
Firmly grasp the front seat side shield, lift up
and out, separating the side shield from the recliner bracket.
.jpg) |
-
Disconnect the electrical connector and remove the front seat side shield.
.jpg) |
All seats
-
Remove the screws and the recline cover.
.jpg) |
Vehicles with heated seats
-
-
Detach and disconnect the front seat backrest heater mat electrical connector.
-
Detach and disconnect the front seat backrest heater mat electrical connector.
-
Detach the front seat cushion heater mat wiring harness retainer and position aside.
-
Detach and disconnect the front seat backrest heater mat electrical connector.
.jpg) |
All Seats
-
-
Detach the front seat backrest cover straps.
-
Position the front seat backrest cover aside.
-
Detach the front seat backrest cover straps.
.jpg) |
-
-
Disconnect the side airbag harness electrical connector.
-
Disconnect the front seat harness electrical connector.
-
Detach the front seat wiring harness retainers.
-
Disconnect the side airbag harness electrical connector.
.jpg) |
-
On both sides.
Remove the bolts and the front seat backrest.
Torque: 33 lb.ft (45 Nm)
.jpg) |
Installation
All seats
-
To install, reverse the removal procedure.
Driver seat
-
NOTE: This step is only necessary when installing a new seat backrest frame with memory seat option.
Operate the seat backrest in both directions through the full range of travel to set soft stops and avoid a premature stopping point occurrence after the vehicle is returned to the customer.
 Removal and Installation - Front Seat
Removal
WARNING:
The following procedure describes critical repair steps
required for correct seat component installation. Follow all notes and
steps carefully...
 Removal and Installation - Front Seat Backrest Cover
Special Tool(s) /
General Equipment
Hog Ring Plier
Removal
WARNING:
Front seat backrest trim covers installed on seats equipped
with seat side airbags cannot be repaired...
Other information:
Ford Escape 2020-2026 Owners Manual: Master Access Code
What Is the Master Access Code The master access code is a factory-set five-digit entry code. You can operate the keypad with the master access code at any time. The master access code is on the owner’s wallet card in the glove box and is available from an authorized dealer...
Ford Escape 2020-2026 Service Manual: General Procedures - High Voltage Connector Disconnect and Connect
Disconnect WARNING: To prevent the risk of high-voltage shock, always follow precisely all warnings and service instructions, including instructions to depower the system. The high-voltage system utilizes approximately 450 volts DC, provided through high-voltage cables to its components and modules...
Categories
- Manuals Home
- 4th Generation Ford Escape Owners Manual
- 4th Generation Ford Escape Service Manual
- Switching the Rear Window Wiper On and Off. Reverse Wipe
- Rear View Camera
- Removal and Installation - All-Wheel Drive (AWD) Module - 1.5L EcoBoost (132kW/180PS) – I3 (Y1)/2.0L EcoBoost (177kW/240PS) – MI4
- New on site
- Most important about car
Sitting in the Correct Position
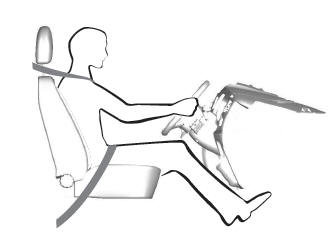
When you use them properly, the seat, head restraint, seatbelt and airbags will provide optimum protection in the event of a crash.