Ford Escape: High Voltage Battery, Mounting and Cables / Removal and Installation - High Voltage Battery Cover - Plug-In Hybrid Electric Vehicle (PHEV)
Special Tool(s) / General Equipment
| Power Caulk Gun | |
| Power Fixed Glass Removal Tool | |
| Vacuum Cleaner |
Materials
| Name | Specification |
|---|---|
| Motorcraft® High Performance Engine RTV Silicone TA-357 |
WSE-M4G323-A6 |
| Sika® SikaTack® MACH 60 / Sika® SikaTack® MACH 30 / Dow® BETASEAL™ Express | - |
| Sika® Aktivator PRO / Dow® BETAPRIME™ 5504G / Sika® Primer-207 | - |
Removal
 WARNING:
To prevent the risk of high-voltage shock, always follow
precisely all warnings and service instructions, including instructions
to depower the system. The high-voltage system utilizes approximately
450 volts DC, provided through high-voltage cables to its components and
modules. The high-voltage cables and wiring are identified by orange
harness tape or orange wire covering. All high-voltage components are
marked with high-voltage warning labels with a high-voltage symbol.
Failure to follow these instructions may result in serious personal
injury or death.
WARNING:
To prevent the risk of high-voltage shock, always follow
precisely all warnings and service instructions, including instructions
to depower the system. The high-voltage system utilizes approximately
450 volts DC, provided through high-voltage cables to its components and
modules. The high-voltage cables and wiring are identified by orange
harness tape or orange wire covering. All high-voltage components are
marked with high-voltage warning labels with a high-voltage symbol.
Failure to follow these instructions may result in serious personal
injury or death.
-
Refer to: High Voltage System Health and Safety Precautions - Overview (100-00 General Information, Description and Operation).
-
De-energize the high voltage system.
Refer to: High Voltage System De-energizing (414-03A High Voltage Battery, Mounting and Cables, General Procedures).
-
Remove the high voltage battery.
Refer to: High Voltage Battery - Plug-In Hybrid Electric Vehicle (PHEV) (414-03A High Voltage Battery, Mounting and Cables, Removal and Installation).
-
-
Remove the pushpins and the high voltage battery rear outer shield.
-
Remove the pushpins and the high voltage battery rear outer shield and vent tube.
-
Remove the pushpins and the high voltage battery rear outer shield.
.jpg) |
-
Remove and discard the high voltage battery cover nuts.
.jpg) |
-
Remove the high voltage battery cover bolts. Discard the center high voltage battery cover bolts.
.jpg) |
-
NOTICE: Only use an oscillating saw with a maximum blade length of 57 mm (2.25 in) to cut the high voltage battery cover seal. Do not use a reciprocating saw or a blade greater than 57 mm (2.25 in) in length to cut the high voltage battery cover seal or damage to the high voltage battery may occur.
NOTICE: Use the oscillating saw with the flat side of the blade facing the high voltage battery cover and the beveled side of the blade facing the high voltage battery tray. Be careful not to scratch the upper portion of the high voltage battery tray. If the high voltage battery tray is scratched to bare metal, a primer must be applied.
Click here to view a video version of this procedure.Cutting the High Voltage Battery Cover Seal
.jpg) Using a power fixed glass removal tool such as an Air
Windshield Remover, Rotunda ASTWINDKO or equivalent with a maximum blade
length of 57 mm (2.25 in), cut the seal high voltage battery cover seal
in an upward motion and discard the high voltage battery cover.
Using a power fixed glass removal tool such as an Air
Windshield Remover, Rotunda ASTWINDKO or equivalent with a maximum blade
length of 57 mm (2.25 in), cut the seal high voltage battery cover seal
in an upward motion and discard the high voltage battery cover.
Use the General Equipment: Power Fixed Glass Removal Tool
.jpg) |
-
If equipped, remove and discard the high voltage inside cover nut seals.
 |
Installation
-
NOTICE: The high voltage battery cover must be installed within 2 hours of skim cutting the urethane adhesive. Exposed cut surface of urethane become oxidized and inactive beyond 2 hours, this reduces the effectiveness of the high voltage battery cover bond.
NOTICE: Do not use metal scrapers, wire brushes, power abrasive discs or other abrasive means to clean the sealing surfaces.
-
Skim cut the existing urethane adhesive below the height of the new high voltage battery cover spacers.
-
If a bare metal scratch is shown on the top of the
high voltage battery mating surface, a primer must be applied. Apply
the primer according to the manufacturer's instructions and allow at
least 10 minutes to dry.
Material: Sika® Aktivator PRO / Dow® BETAPRIME™ 5504G / Sika® Primer-207
-
Skim cut the existing urethane adhesive below the height of the new high voltage battery cover spacers.
.jpg) |
-
NOTICE: Remove all debris from inside of the high voltage battery tray or component damage may occur.
Remove all debris from inside of the high voltage battery tray.
Use the General Equipment: Vacuum Cleaner
.jpg) |
-
Install the new high voltage inside cover nut seals.
.jpg) |
-
Attach the new high voltage battery cover spacers to the top of the high voltage battery tray.
.jpg) |
-
NOTE: The high voltage battery cover must be installed within 10 minutes of applying the urethane adhesive.
Cut the urethane adhesive applicator tip to specification.
Material: Sika® SikaTack® MACH 60 / Sika® SikaTack® MACH 30 / Dow® BETASEAL™ Express
.jpg) |
-
Apply a urethane adhesive bead 14 mm (0.55 in) high and 7
mm (0.27 in) wide on top of the existing trimmed urethane adhesive bead
on the high voltage battery tray.
.jpg) |
-
NOTICE: Make sure the urethane bead is uniform to prevent air and water leaks.
NOTE: Use a power caulk gun that applies the urethane adhesive with less effort and a continuous bead.
-
Apply a 7 mm (.27 in) bead of urethane adhesive to the top of the high voltage battery tray.
Use the General Equipment: Power Caulk Gun
-
80 mm (3.14 in) minimum distance of urethane adhesive overlap.
-
14 mm (.55 in) minimum height of urethane adhesive.
-
Apply a 7 mm (.27 in) bead of urethane adhesive to the top of the high voltage battery tray.
.jpg) |
-
With the aid of an assistant, install the high voltage battery cover.
.jpg) |
-
-
Install the high voltage battery cover bolts.
Torque: 106 lb.in (12 Nm)
-
Install the new high voltage battery cover bolts.
Torque: 119 lb.in (13.5 Nm)
-
Install the high voltage battery cover bolts.
Torque: 133 lb.in (15 Nm)
-
Install the high voltage battery cover bolts.
.jpg) |
High Voltage Batteries Built with Silicon Applied to Cover Nuts
-
-
Install the new nuts until contact is made with the high voltage battery cover.
-
Tighten the high voltage battery cover nuts.
Torque: 59 lb.ft (80 Nm)
-
Install the new nuts until contact is made with the high voltage battery cover.
.jpg) |
-
Apply a 4 mm (0.15 in) bead of silicone sealant
with a 25 mm (0.98 in) overlap between the nuts and the high voltage
battery cover.
Material: Motorcraft® High Performance Engine RTV Silicone / TA-357 (WSE-M4G323-A6)
.jpg) |
-
Apply the silicone sealant between the nuts and the high voltage battery cover to ensure a proper seal.
.jpg) |
High Voltage Batteries Built without Silicon Applied to Cover Nuts
-
-
Install the new nuts until contact is made with the high voltage battery cover.
-
Tighten the high voltage battery cover nuts.
Torque: 74 lb.ft (100 Nm)
-
Install the new nuts until contact is made with the high voltage battery cover.
|
All Vehicles
-
NOTICE: For proper adhesion of the high voltage battery cover label, the mating surface must be clean and free of foreign material.
-
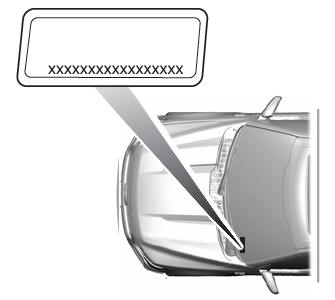
Clean the metal surface with an alcohol wipe where the high voltage battery cover label is being placed.
-
Remove the back-liner from the new high voltage
battery cover label and firmly place onto the high voltage battery cover
as shown.
-
Clean the metal surface with an alcohol wipe where the high voltage battery cover label is being placed.
.jpg) |
-
Check the high voltage battery for leaks.
Refer to: High Voltage Battery Leak Test - Plug-In Hybrid Electric Vehicle (PHEV) (414-03A High Voltage Battery, Mounting and Cables, General Procedures).
-
-
Install the high voltage battery rear outer shield and pushpins.
-
Install the high voltage battery vent tube, outer shield and pushpins.
-
Install the high voltage battery rear outer shield and pushpins.
.jpg) |
-
Install the high voltage battery.
Refer to: High Voltage Battery - Plug-In Hybrid Electric Vehicle (PHEV) (414-03A High Voltage Battery, Mounting and Cables, Removal and Installation).
 Removal and Installation - High Voltage Battery Cables - Plug-In Hybrid Electric Vehicle (PHEV)
Removal
WARNING:
To prevent the risk of high-voltage shock, always follow
precisely all warnings and service instructions, including instructions
to depower the system...
 Removal and Installation - High Voltage Battery Junction Box - Plug-In Hybrid Electric Vehicle (PHEV)
Removal
WARNING:
To prevent the risk of high-voltage shock, always follow
precisely all warnings and service instructions, including instructions
to depower the system...
Other information:
Ford Escape 2020-2025 Owners Manual: What is a Hybrid Electric Vehicle. How Does a Hybrid Electric Vehicle Work. Hybrid Electric Vehicle Driving Characteristics
What is a Hybrid Electric Vehicle A hybrid vehicle has an electric motor and a high voltage battery combined with a gasoline engine. How Does a Hybrid Electric Vehicle Work The hybrid vehicle combines electric and gasoline propulsion to provide optimal performance and improved efficiency...
Ford Escape 2020-2025 Owners Manual: Fuel Economy Display - Gasoline, Hybrid Electric Vehicle (HEV), Plug-In Hybrid Electric Vehicle (PHEV)
Fuel Economy Display - Gasoline An instant fuel economy gauge is provided along with average fuel economy. Average fuel economy is continuously averaged since the last reset. Note: Press and hold the OK button on the controls on the steering wheel to reset your average fuel economy...
Categories
- Manuals Home
- 4th Generation Ford Escape Owners Manual
- 4th Generation Ford Escape Service Manual
- Fuel Quality
- Opening and Closing the Hood
- Plug-In Hybrid Electric Vehicle Drive Modes
- New on site
- Most important about car
Vehicle Identification
Locating the Vehicle Identification Number
The vehicle identification number is on the left-hand side of the instrument panel.