Ford Escape: Climate Control System - General Information / Removal and Installation - Desiccant Bag - 1.5L EcoBoost (132kW/180PS) – I3 (Y1)
Special Tool(s) / General Equipment
| Long Nose Pliers |
Removal
NOTICE: During the removal of components, cap, tape or otherwise appropriately protect all openings to prevent the ingress of dirt or other contamination. Remove protective materials prior to installation.
NOTE: Installation of a new desiccant bag is not required when repairing the A/C system, except when there is physical evidence of contamination from a failed A/C compressor or damage to the receiver/drier desiccant bag. It is not necessary to add additional dye to the refrigerant system, the new receiver/drier desiccant bag comes with a new dye pellet. Damage to the receiver/drier desiccant bag includes physical damage to the receiver/drier desiccant bag or moisture contamination. Moisture contamination results only from a complete loss of refrigerant and equalization of the refrigerant system pressure with atmospheric pressure for a period longer than one hour. If even a slight amount of positive refrigerant pressure is present in the system before repairs are carried out, the receiver/drier desiccant bag should not be replaced.
NOTE: Removal steps in this procedure may contain installation details.
-
Recover the refrigerant. Refer to the appropriate Recovery procedure in Group 412.
-
Remove the condensor.
Refer to: Condenser - 1.5L EcoBoost (132kW/180PS) – I3 (Y1) (412-00 Climate Control System - General Information, Removal and Installation).
-
Remove the receiver/drier cap.
.jpg) |
-
Remove the receiver/drier plug and the desiccant bag.
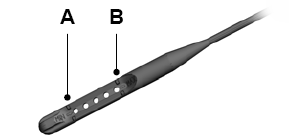
Use the General Equipment: Long Nose Pliers
.jpg) |
Installation
-
To install, reverse the removal procedure.
-
NOTICE: Only use the specified material to lubricate the seals.
Install and lubricate new O-ring seals. Refer to the appropriate Specifications in Group 412.
-
Lubricate the refrigerant system with the correct amount
of clean PAG oil. Refer to the appropriate Refrigerant Oil Adding
procedure in Group 412.
 Removal and Installation - Condenser Outlet Line - 1.5L EcoBoost (132kW/180PS) – I3 (Y1)
Removal
NOTICE:
During the removal of components, cap, tape or otherwise
appropriately protect all openings to prevent the ingress of dirt or
other contamination...
 Removal and Installation - Driver Side Footwell Air Discharge Temperature Sensor
Removal
Remove the driver knee aitbag.
Refer to: Driver Knee Airbag (501-20B Supplemental Restraint System, Removal and Installation).
NOTE:
Acessed behind the lower trim panel...
Other information:
Ford Escape 2020-2024 Service Manual: Description and Operation - Information and Entertainment System - System Operation and Component Description
System Operation System Diagram NOTE: The system diagrams include all component options. Some components may not be equipped on the vehicle. Audio System *.sttxt { visibility: hidden; } *.stcallout { visibility: visible; } E345256 1 APIM 2 GWM 3 BCM ..
Ford Escape 2020-2024 Service Manual: Description and Operation - Blind Spot Information System - System Operation and Component Description
System Operation BLIS ® and CTA System Diagram - Vehicles Without Door Modules Item Description 1 SODL 2 GWM 3 SCCM 4 PAM 5 IPC 6 APIM 7 PCM 8 TRM (If equipped) 9 BCM 10 ACM 11 LH exterior mirror 12 DSP Module 13 10 Speaker System 14 ..
Categories
- Manuals Home
- 4th Generation Ford Escape Owners Manual
- 4th Generation Ford Escape Service Manual
- All-Wheel Drive
- Switching the Rear Window Wiper On and Off. Reverse Wipe
- General Procedures - Transmission Fluid Level Check
- New on site
- Most important about car
Engine Oil
Engine Oil Dipstick Overview