Ford Escape 2020-2026 Service Manual / Powertrain / Fuel System - General Information / Fuel Tank and Lines / Removal and Installation - Fuel Tank
Ford Escape: Fuel Tank and Lines / Removal and Installation - Fuel Tank
Special Tool(s) / General Equipment
| Powertrain Jack |
Removal
.jpg)
.jpg)
.jpg)
.jpg) WARNING:
Do not smoke, carry lighted tobacco or have an open flame of
any type when working on or near any fuel-related component. Highly
flammable mixtures may be present and may be ignited. Failure to follow
these instructions may result in serious personal injury.
WARNING:
Do not smoke, carry lighted tobacco or have an open flame of
any type when working on or near any fuel-related component. Highly
flammable mixtures may be present and may be ignited. Failure to follow
these instructions may result in serious personal injury.
NOTE: Removal steps in this procedure may contain installation steps.
-
Refer to: Gasoline and Gasoline-Ethanol Fuel Systems Health and Safety
Precautions (100-00 General Information, Description and Operation).
-
Disconnect the battery.
Refer to: Battery Disconnect and Connect (414-01 Battery, Mounting and Cables, General Procedures).
-
With the vehicle in NEUTRAL, position it on a hoist.
Refer to: Jacking and Lifting - Overview (100-02 Jacking and Lifting, Description and Operation).
-
Release the fuel system pressure.
Refer to: Fuel System Pressure Release (310-00C Fuel System - General Information, General Procedures).
-
Drain the fuel tank.
-
Remove the muffler and tailpipe.
Refer to: Muffler and Tailpipe - Plug-In Hybrid Electric Vehicle (PHEV) (309-00C Exhaust System, Removal and Installation).
-
-
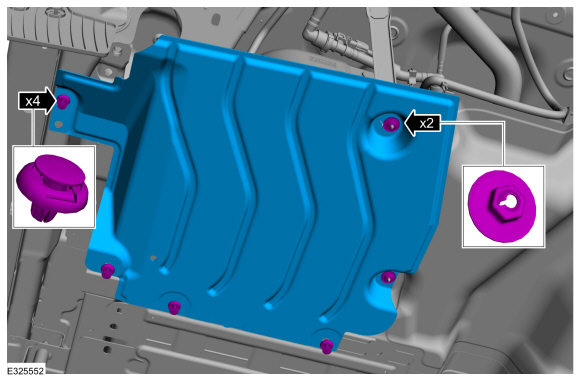
Remove the retainers.
-
Remove the nuts and LH air deflector.
Torque: 22 lb.in (2.5 Nm)
-
Remove the retainers.
 |
-
-
Remove the retainers.
-
Remove the nuts and RH air deflector.
Torque: 22 lb.in (2.5 Nm)
-
Remove the retainers.
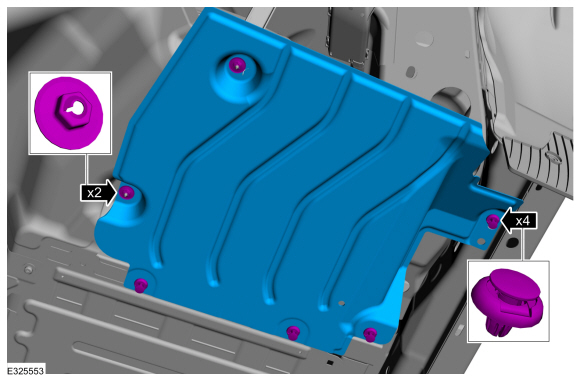 |
-
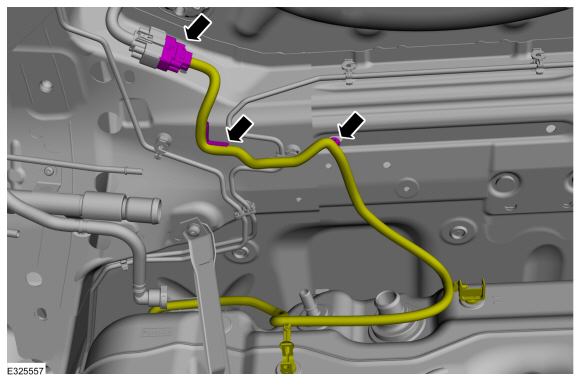
NOTE: Always wrap the fuel line connection with a towel before disconnecting it.
Disconnect the quick connectors.
Refer to: Quick Release Coupling (310-00C Fuel System - General Information, General Procedures).
.jpg) |
-
Remove the fuel tank heat shield.
Torque: 22 lb.in (2.5 Nm)
.jpg) |
-
Disconnect the quick connectors and electrical connector.
Refer to: Quick Release Coupling (310-00C Fuel System - General Information, General Procedures).
.jpg) |
-
-
Disconnect the electrical connector.
-
Detach the retainer clips.
-
Disconnect the electrical connector.
 |
-
NOTE: This step requires the aid of another technician.
Remove the bolts and fuel tank from the vehicle.
Use the General Equipment: Powertrain Jack
Torque: 22 lb.ft (30 Nm)
.jpg) |
Installation
-
To install, reverse the removal procedure.
 Removal and Installation - Fuel Pump and Sender Unit
Special Tool(s) /
General Equipment
310-123Locking Ring, Fuel TankTKIT-2004J-FTKIT-2005U-LM
Removal
WARNING:
Do not smoke, carry lighted tobacco or have an open flame of
any type when working on or near any fuel-related component...
 Removal and Installation - Fuel Tank Filler Pipe
Removal
NOTE:
Removal steps in this procedure may contain installation steps.
Refer to: Gasoline and Gasoline-Ethanol Fuel Systems Health and Safety
Precautions (100-00 General Information, Description and Operation)...
Other information:
Ford Escape 2020-2026 Service Manual: Removal and Installation - Radio Transceiver Module (RTM)
Removal NOTE: Removal steps in this procedure may contain installation details. NOTE: If installing a new module, it is necessary to upload the module configuration information to the diagnostic scan tool prior to removing the module. This information must be downloaded into the new module after installation...
Ford Escape 2020-2026 Service Manual: Description and Operation - Engine Component View
Lower Engine Block (View 1) Item Part Number Description 1 60156015 Cylinder block 2 6K3186K318 Crankshaft rear oil seal and retainer 3 6K3906K390 Flywheel 4 75507550 Damper 5 66766676 Oil pan 6 67146714 Oil filter 7 68846884 Oil filter adapter 8 6B8566B856 Oil filter cooler 9 6A6366A636 ..
Categories
- Manuals Home
- 4th Generation Ford Escape Owners Manual
- 4th Generation Ford Escape Service Manual
- Rear View Camera
- All-Wheel Drive
- Accessing the Trip Computer. Resetting the Trip Computer
- New on site
- Most important about car
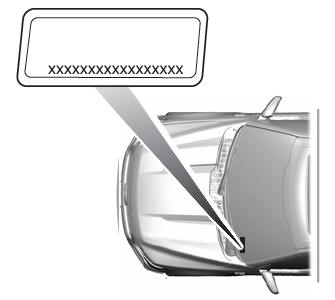
Vehicle Identification
Locating the Vehicle Identification Number
The vehicle identification number is on the left-hand side of the instrument panel.
Copyright © 2026 www.fordescape4.com