Ford Escape 2020-2026 Service Manual / Body and Paint / Body and Paint / Interior Trim and Ornamentation / Removal and Installation - Liftgate Trim Panel
Ford Escape: Interior Trim and Ornamentation / Removal and Installation - Liftgate Trim Panel
Special Tool(s) / General Equipment
| Interior Trim Remover |
Removal
-
Release the clips and remove the liftgate center upper trim panel.
Use the General Equipment: Interior Trim Remover
.jpg) |
-
Release the clips and remove the liftgate RH upper trim panel.
Use the General Equipment: Interior Trim Remover
.jpg) |
-
Release the clips and remove the liftgate LH upper trim panel.
 |
-
Release the tabs and remove the liftgate lower trim panel screws cover.
Use the General Equipment: Interior Trim Remover
.jpg) |
-
Remove the liftgate lower trim panel screws.
.jpg) |
-
Remove the liftgate lower trim panel.
-
Release the liftgate lower trim panel clips.
Use the General Equipment: Interior Trim Remover
-
If equipped.
Disconnect the power liftgate lower switch electrical connector.
-
Disconnect the liftgate lower trim panel interior lamp electrical connector.
-
Release the liftgate lower trim panel clips.
.jpg) |
Installation
-
To install, reverse the removal procedure.
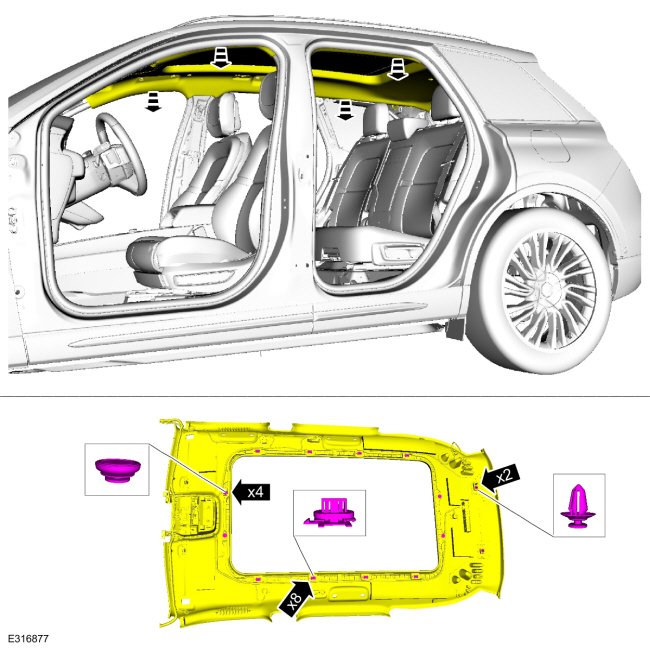
 Removal and Installation - Headliner - Lowering
Special Tool(s) /
General Equipment
Pick Hook
Interior Trim Remover
Remove the following items:
On both sides.
Remove the A-pillar trim panel...
 Removal and Installation - Loadspace Scuff Plate Trim Panel
Special Tool(s) /
General Equipment
Interior Trim Remover
Removal
NOTE:
Removal steps in this procedure may contain installation details...
Other information:
Ford Escape 2020-2026 Service Manual: Removal and Installation - Rear Seat
Special Tool(s) / General Equipment Interior Trim Remover Removal WARNING: The following procedure describes critical repair steps required for correct seat component installation. Follow all notes and steps carefully. Do not place any objects between the seat components and the body of the vehicle, nor any objects within a joint internal to the seat structure...
Ford Escape 2020-2026 Service Manual: General Procedures - Fuel Tank Draining
Special Tool(s) / General Equipment 292-00004Fuel Tanker 100 GPM Draining WARNING: Before beginning any service procedure in this section, refer to Safety Warnings in section 100-00 General Information. Failure to follow this instruction may result in serious personal injury...
Categories
- Manuals Home
- 4th Generation Ford Escape Owners Manual
- 4th Generation Ford Escape Service Manual
- Description and Operation - Identification Codes
- Symbols Glossary
- Plug-In Hybrid Electric Vehicle Drive Modes
- New on site
- Most important about car
Fastening the Seatbelts

Copyright © 2026 www.fordescape4.com