Ford Escape: Front Drive Halfshafts / Diagnosis and Testing - Front Drive Halfshafts
Preliminary Inspection
-
Visually inspect the CV joints, housing, boots, and clamps for obvious signs of mechanical damage.
-
If an obvious cause for an observed or reported concern is
found, correct the cause (if possible) before proceeding to the next
step
-
If the cause is not visually evident, verify the symptom and REFER to Symptom Chart: NVH.
Symptom Chart(s)
Diagnostics in this manual assume a certain skill level and knowledge of Ford-specific diagnostic practices.
REFER to: Diagnostic Methods (100-00 General Information, Description and Operation).
Symptom Chart: NVH
Symptom Chart
| Condition | Actions |
|---|---|
| Axle howling or whine – front or rear axle | GO to Pinpoint Test A |
| Driveline clunk - loud clunk when shifting from REVERSE to DRIVE | GO to Pinpoint Test B |
| Driveline clunk (Front Wheel Drive (FWD) vehicles) — occurs during acceleration or from cruise to coast/deceleration | GO to Pinpoint Test C |
| Driveline clunk — occurs as the vehicle starts to move forward following a stop | GO to Pinpoint Test D |
| Clicking, popping or grinding - occurs while the vehicle is turning | GO to Pinpoint Test E |
| Grunting — normally associated with a shudder experienced during acceleration from a complete stop | GO to Pinpoint Test F |
| Driveline vibration - occurs at cruising speeds | GO to Pinpoint Test G |
Pinpoint Tests
|
Normal Operation and Fault Conditions Halfshafts transmit rotary motion through constant velocity joints in a uniform manner. The outer CV joints use balls, have no length compensation and engage in the wheel hubs. The intermediate shaft (right side) is correctly positioned and secured in the differential by the intermediate shaft center bearing. The left CV joint is locked in the differential by a snap-ring. Possible Sources
|
||||
| A1 INSPECT WHEEL HUB BEARINGS | ||||
Was any wheel hub bearing play or damage found?
|
|
Normal Operation and Fault Conditions Halfshafts transmit rotary motion through constant velocity joints in a uniform manner. The outer CV joints use balls, have no length compensation and engage in the wheel hubs. The intermediate shaft (right side) is correctly positioned and secured in the differential by the intermediate shaft center bearing. The left CV joint is locked in the differential by a snap-ring. Possible Sources
|
||||
| B1 CHECK THE HUB NUT TORQUE | ||||
Is the hub nut loose?
|
||||
| B2 CHECK THE TORQUE ON SUSPENSION AND STEERING SYSTEM FASTENERS | ||||
Is the any of the suspension and steering fastener loose?
|
||||
| B3 CHECK THE CONSTANT VELOCITY (CV) BOOTS AND JOINTS FOR WEAR OR DAMAGE | ||||
Was damage found?
|
|
Normal Operation and Fault Conditions Halfshafts transmit rotary motion through constant velocity joints in a uniform manner. The outer CV joints use balls, have no length compensation and engage in the wheel hubs. The intermediate shaft (right side) is correctly positioned and secured in the differential by the intermediate shaft center bearing. The left CV joint is locked in the differential by a snap-ring. Possible Sources
|
||||
| C1 CHECK THE HUB NUT TORQUE | ||||
Is the hub nut loose?
|
||||
| C2 CHECK THE TORQUE ON SUSPENSION AND STEERING SYSTEM FASTENERS | ||||
Is the any of the suspension and steering fastener loose?
|
||||
| C3 CHECK THE CONSTANT VELOCITY (CV) BOOTS AND JOINTS FOR WEAR OR DAMAGE | ||||
Was damage found?
|
|
Normal Operation and Fault Conditions Halfshafts transmit rotary motion through constant velocity joints in a uniform manner. The outer CV joints use balls, have no length compensation and engage in the wheel hubs. The intermediate shaft (right side) is correctly positioned and secured in the differential by the intermediate shaft center bearing. The left CV joint is locked in the differential by a snap-ring. Possible Sources
|
||||
| D1 CHECK FOR LOOSE HUB NUT | ||||
Are any hub nuts loose?
|
||||
| D2 CHECK THE TORQUE ON SUSPENSION AND STEERING SYSTEM FASTENERS | ||||
Is the any of the suspension and steering fastener loose?
|
|
Normal Operation and Fault Conditions Halfshafts transmit rotary motion through constant velocity joints in a uniform manner. The outer CV joints use balls, have no length compensation and engage in the wheel hubs. The intermediate shaft (right side) is correctly positioned and secured in the differential by the intermediate shaft center bearing. The left CV joint is locked in the differential by a snap-ring. Possible Sources
|
||||
| E1 CHECK THE CONSTANT VELOCITY (CV) BOOTS AND JOINTS FOR WEAR OR DAMAGE | ||||
Was wear or damage found?
|
||||
| E2 CHECK THE HALFSHAFTS FOR CONTACT WITH ANOTHER COMPONENT | ||||
Is there contact between other components with the halfshaft?
|
||||
| E3 INSPECT THE HALFSHAFT OR HALFSHAFT CIRCLIP | ||||
Was any damage found?
|
|
Normal Operation and Fault Conditions Halfshafts transmit rotary motion through constant velocity joints in a uniform manner. The outer CV joints use balls, have no length compensation and engage in the wheel hubs. The intermediate shaft (right side) is correctly positioned and secured in the differential by the intermediate shaft center bearing. The left CV joint is locked in the differential by a snap-ring. Possible Sources
|
||||
| F1 CHECK THE OUTER CONSTANT VELOCITY (CV) JOINT FOR CORRECT SEATING INTO THE HUB | ||||
Is the outer Constant Velocity (CV) joint seated correctly into the hub?
|
|
Normal Operation and Fault Conditions Halfshafts transmit rotary motion through constant velocity joints in a uniform manner. The outer CV joints use balls, have no length compensation and engage in the wheel hubs. The intermediate shaft (right side) is correctly positioned and secured in the differential by the intermediate shaft center bearing. The left CV joint is locked in the differential by a snap-ring. Possible Sources
|
||||
| G1 CHECK THE OUTER CONSTANT VELOCITY (CV) JOINT FOR CORRECT SEATING INTO THE HUB | ||||
Is the outer Constant Velocity (CV) joint seated correctly into the hub?
|

 Removal and Installation - Front Halfshaft LH
Special Tool(s) /
General Equipment
204-161
(T97P-1175-A)
Installer, HalfshaftTKIT-1997-LM2TKIT-1997-F/FM2TKIT-1997-FLM2
205-D070
(D93P-1175-B)
Remover, Front Wheel Hub
Tie Rod End Remover
Removal
Remove the wheel and tire...
Other information:
Ford Escape 2020-2026 Owners Manual: Steering
Electric Power Steering Electric Power Steering Precautions WARNING: The electric power steering system has diagnostic checks that continuously monitor the system. If a fault is detected, a message displays in the information display. Stop your vehicle as soon as it is safe to do so...
Ford Escape 2020-2026 Service Manual: Removal and Installation - Fuel Tank Isolation Valve - Plug-In Hybrid Electric Vehicle (PHEV)
Removal WARNING: Do not smoke, carry lighted tobacco or have an open flame of any type when working on or near any fuel-related component. Highly flammable mixtures may be present and may be ignited. Failure to follow these instructions may result in serious personal injury...
Categories
- Manuals Home
- 4th Generation Ford Escape Owners Manual
- 4th Generation Ford Escape Service Manual
- Electric Parking Brake
- Locating the Pre-Collision Assist Sensors
- Adjusting the Headlamps
- New on site
- Most important about car
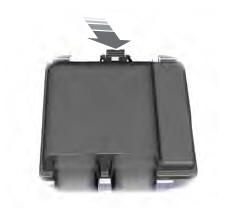
Under Hood Fuse Box
Locating the Under Hood Fuse Box
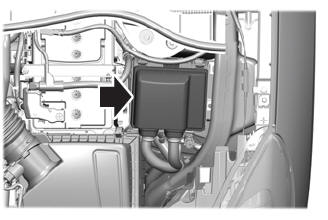
Accessing the Under Hood Fuse Box