Ford Escape 2020-2026 Service Manual / Body and Paint / Body and Paint / Interior Trim and Ornamentation / Removal and Installation - Loadspace Trim Panel
Ford Escape: Interior Trim and Ornamentation / Removal and Installation - Loadspace Trim Panel
Special Tool(s) / General Equipment
| Interior Trim Remover |
Removal
NOTE: LH (left hand) shown, RH (right hand) similar.
-
Remove the rear scuff plate trim panel.
Refer to: Rear Scuff Plate Trim Panel (501-05 Interior Trim and Ornamentation, Removal and Installation).
-
Remove the loadspace scuff plate trim panel.
Refer to: Loadspace Scuff Plate Trim Panel (501-05 Interior Trim and Ornamentation, Removal and Installation).
-
Position the liftgate opening weather strip aside.
.jpg) |
-
Fold the rear seat backrest into the fold flat position.
.jpg) |
Left hand side
-
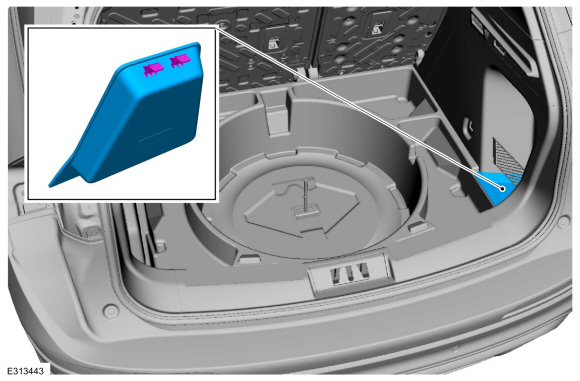
Remove the loadspace trim panel.
-
Release the loadspace trim panel clips.
Use the General Equipment: Interior Trim Remover
-
Disconnect the luggage compartment power point electrical connector.
-
Release the loadspace trim panel clips.
 |
Right hand side
-
Remove the loadspace trim panel.
-
Release the loadspace trim panel clips.
Use the General Equipment: Interior Trim Remover
-
Disconnect the luggage compartment interior lamp electrical connector.
-
Release the loadspace trim panel clips.
.jpg) |
Installation
-
To install, reverse the removal procedure.
-
Inspect and position the rear door weather strip lip so that it overlaps the top of the loadspace trim panel.
.jpg) |
 Removal and Installation - Loadspace Scuff Plate Trim Panel
Special Tool(s) /
General Equipment
Interior Trim Remover
Removal
NOTE:
Removal steps in this procedure may contain installation details...
 Removal and Installation - Rear Door Trim Panel
Special Tool(s) /
General Equipment
Pick Hook
Interior Trim Remover
Removal
NOTE:
LH (left hand) shown, RH (right hand) similar.
NOTE:
Removal steps in this procedure may contain installation details...
Other information:
Ford Escape 2020-2026 Owners Manual: Plug-In Hybrid Electric Vehicle Information – Troubleshooting
Plug-In Hybrid Electric Vehicle Information – Warning Lamps It illuminates if your vehicle's electrical system requires service to identify the cause for your vehicle to shutdown or enter a limited operating mode. A message may appear in the instrument cluster display...
Ford Escape 2020-2026 Service Manual: Removal and Installation - Ignition Switch
Removal Remove the center registers. Refer to: Center Registers (412-00 Climate Control System - General Information, Removal and Installation). Disconnect the ignition switch electrical connector. Release the locking tabs and remove the ignition switch...
Categories
- Manuals Home
- 4th Generation Ford Escape Owners Manual
- 4th Generation Ford Escape Service Manual
- Locating the Pre-Collision Assist Sensors
- Symbols Glossary
- Power Outlet - Vehicles With: 12V Power Outlet
- New on site
- Most important about car
Engine Oil
Engine Oil Dipstick Overview
Copyright © 2026 www.fordescape4.com