Ford Escape 2020-2024 Service Manual / Electrical / Climate Control System / Climate Control System - General Information / Removal and Installation - Thermostatic Expansion Valve Manifold and Tube Assembly - 1.5L EcoBoost (132kW/180PS) – I3 (Y1)
Ford Escape: Climate Control System - General Information / Removal and Installation - Thermostatic Expansion Valve Manifold and Tube Assembly - 1.5L EcoBoost (132kW/180PS) – I3 (Y1)
Removal
NOTICE: During the removal of components, cap, tape or otherwise appropriately protect all openings to prevent the ingress of dirt or other contamination. Remove protective materials prior to installation.
NOTE: Removal steps in this procedure may contain installation details.
-
Recover the refrigerant. Refer to the appropriate Recovery procedure in Group 412.
-
-
Detach the coolant hose retainer.
-
Remove the bolts and the degas bottle support bracket.
Torque: 35 lb.ft (48 Nm)
-
Detach the coolant hose retainer.
.jpg) |
-
Release the tabs and position the degas bottle aside.
.jpg) |
-
-
Remove the nut and disconnect the A/C compressor inlet line.
Torque: 159 lb.in (18 Nm)
-
Remove the bolt and position the A/C line bracket aside.
Torque: 89 lb.in (10 Nm)
-
Make sure to cover any open ports to prevent debris from entering the system.
-
Remove the nut and disconnect the A/C compressor inlet line.
.jpg) |
-
-
Remove the nut and disconnect the A/C line.
Torque: 159 lb.in (18 Nm)
-
Release the routing clips and position the A/C line aside.
-
Make sure to cover any open ports to prevent debris from entering the system.
-
Remove the nut and disconnect the A/C line.
.jpg) |
-
Remove the bolt and position the A/C line bracket aside.
Torque: 89 lb.in (10 Nm)
.jpg) |
-
-
Remove the thermostatic expansion valve nut and the thermostatic expansion valve manifold and tube assembly.
Torque: 159 lb.in (18 Nm)
-
Make sure to cover any open ports to prevent debris from entering the system.
-
Remove the thermostatic expansion valve nut and the thermostatic expansion valve manifold and tube assembly.
.jpg) |
Installation
-
To install, reverse the removal procedure.
-
NOTICE: Only use the specified material to lubricate the seals.
Install and lubricate new O-ring seals. Refer to the appropriate Specifications in Group 412.
-
Lubricate the refrigerant system with the correct amount
of clean PAG oil. Refer to the appropriate Refrigerant Oil Adding
procedure in Group 412.
 Removal and Installation - Thermostatic Expansion Valve - 1.5L EcoBoost (132kW/180PS) – I3 (Y1)
Removal
NOTICE:
During the removal of components, cap, tape or otherwise
appropriately protect all openings to prevent the ingress of dirt or
other contamination...

Other information:
Ford Escape 2020-2024 Service Manual: Description and Operation - Differential
The differential allows the halfshafts and wheels to rotate at different speeds during cornering. The differential assembly consists of the following components: Differential carrier Two pinion gears Two side gears When driving in a straight line, both front wheels rotate at relatively the same speed. This means both side gears are rotating at the same speed as well,..
Ford Escape 2020-2024 Owners Manual: Electromagnetic Compatibility
WARNING: Do not place objects or mount equipment on or near the airbag cover, on the side of the front or rear seatbacks, or in areas that may come into contact with a deploying airbag. Failure to follow these instructions may increase the risk of personal injury in the event of a crash. WARNING: Do not fasten antenna cables to vehicle wiring, fuel pipes and brake pipes. WARNING: Keep ant..
Categories
- Manuals Home
- 4th Generation Ford Escape Owners Manual
- 4th Generation Ford Escape Service Manual
- Electric Parking Brake
- General Procedures - Brake Service Mode Activation and Deactivation
- What Is the Tire Pressure Monitoring System. Tire Pressure Monitoring System Overview
- New on site
- Most important about car
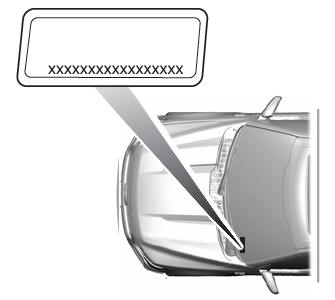
Vehicle Identification
Locating the Vehicle Identification Number
The vehicle identification number is on the left-hand side of the instrument panel.
Copyright © 2024 www.fordescape4.com